surgical procedure
explained step by step
1.
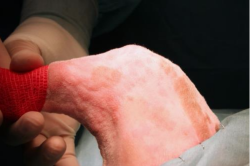
The patient is positioned in dorsal recumbency with abducted legs. The leg to be operated on should be moved so that the axial alignment can be evaluated by flexing and extending the stifle. The surgical approach is centered on the medial side of tibial crest.
2.
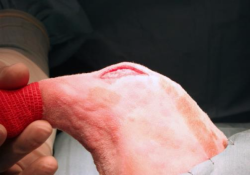
The skin incision is performed at about one third of the tibial width, and extends from a couple of cm proximal to the insertion of the patellar tendon to one cm distal to the tibial crest.
3.
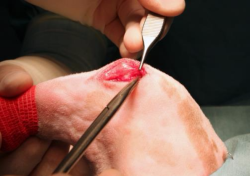
The crural fascia is incised and retracted. This usually causes minimal bleeding. The incision is deepened caudally to the patellar ligament insertion, allowing entry into the joint capsule.
4.
The crural fascia is incised and retracted. This usually causes minimal bleeding. The incision is deepened caudally to the patellar ligament insertion, allowing entry into the joint capsule.
5.
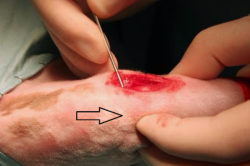
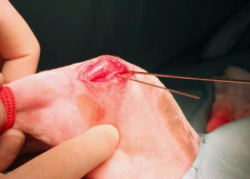
A 1-mm K wire is inserted into the proximal tibia, close to the joint, on the imaginary line that connects the medial malleolus with the intraarticular wire. The limb is positioned vertically, so that its sagittal plane can be evaluated. The K wire inserted in the tibia should move in the horizontal plane. If not, it can be bent manually until it lies on the horizontal plane. This will assure that the osteotomy will be performed on the frontal plane of the tibia.
6.
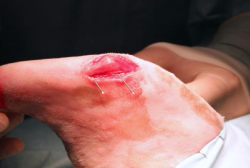
Insert a second 1-mm K wire where the osteotomy will end in the distal part of the tibial crest, holding it parallel to the first one. If the surgeon prefers to perform a Maquet’s hole in the distal tibial crest, the drill bit can be inserted instead of the K wire, but with the same criter
7.
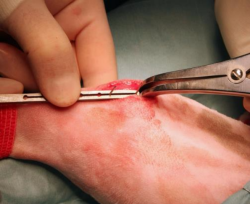
Insert the two K wires through the slot of the TTA guide. They can slide in the slot in order to find the position where the guide best fits with the tibial surface. If a drill bit is used instead of the distal K wire, it should be placed through one of the larger holes in the guide. Put the distractor underneath the patellar tendon, in order to protect it during the osteotomy procedure.
8.
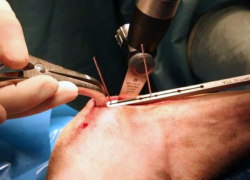
Usually, the guide is used just to perform the first cortical cut, and then removed to better visualize the osteotomy direction. The saw blade should be held on the same plane of the wires. Once the osteotomy path is defined, the wires are removed and the osteotomy completed. It is mandatory to flush with saline throughout the process to avoid bone thermal necrosis.
9.
Once checked that the osteotomy is complete, the advancement of the tibial tuberosity should be performed very progressively, taking advantage of the visco-elastic properties of the bone, in order to prevent the fracture of the distal crest. The distractor should be positioned at the very proximal extremity of the osteotomy, to avoid any interference with the positioning of the wedge.
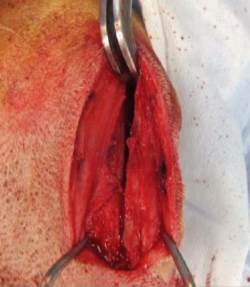
10.
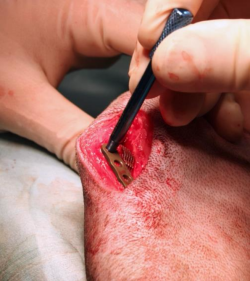
Once the advancement of the crest started, the width of the crest is measured, to choose the wedge of the correct size. The wedge should protrude slightly from the cortices of the tibia, to reduce the risk of sinking into the cancellous bone.
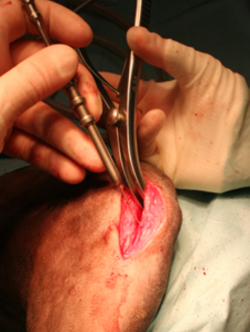
11.
An advancement one mm larger than the scheduled wedge should be achieved. The wedge must be inserted with the arrow on the roof in the direction of introduction.
Although the calculated wedge is used, it is important to perform an intraoperative tibial compression test to check for any residual instability of the joint. If this is the case, the wedge should be replaced with a bigger one until the test is negative.
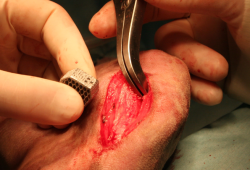
12.
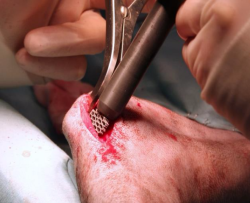
If the wedge doesn’t fit properly with the osteotomy opening, it is important to adapt it by removing part of the 3D structure mesh. It’s important to perform the procedure by cutting the bridges between cells, without crushing the whole structure, to avoid weakening it. The wedge must adapt without create leverage points on the tibial crest.
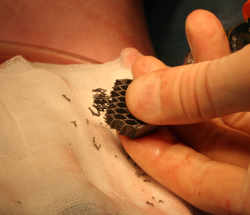
13.
In the event that the wedge is already inserted for the most part, but resistance is encountered in the final part of the introduction, instead of continuing to distract the osteotomy, which can increase the risk of fracture of the tibial crest, an impactor can be used to facilitate its introduction. Generally, one firm stroke is sufficient to position the wedge inside the osteotomy. Once the wedge has been introduced, it is verified that the tibial compression test is negative.
14.
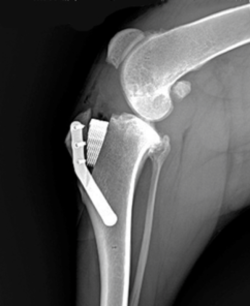
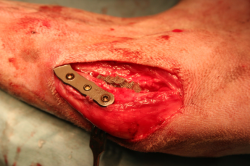
The tibial crest is stabilized by means of the appropriate plate. The cortical tibial screw should be placed more distal than the end of the osteotomy, and the plate’s arm over the tibial crest should encompass its length, with the most proximal screw positioned proximally to the area of insertion of the patellar tendon. The standard technique uses locking screws, but for the tibial screw, which is always cortical. The use of guide sleeve for the positioning of the locking screws on the tibial crest is mandatory.
15.
The proximal end of the wedge is placed distal to the bone plane of the osteotomy to avoid any joint interference. The more distal positioning within the osteotomy opening allows intermediate advancements compared to the standard ones. In no case should the proximal part of the wedge be placed more distal than the distal insertion of the patellar tendon, because it would increase the risk of fracture of the tibial crest.
16.
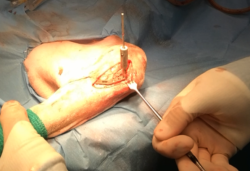
The critical screw is represented by the locked screw inserted on the crest proximal to the insertion of the patellar tendon. This position must be identified and fixed by inserting the drill bit through the guide, and then locking it inside with the appropriate screw on the guide. In this way a push-pull apparatus is created, which stabilizes the chosen position.
17.
The tibial cortical screw is then placed. To maintain the correct angle of insertion of the screw on the frontal plane of the tibia, it is important that the surgeon uses the right hand for the right limbs and the left hand for the left limbs. If the angle is not correct, the risk is to create a crack in the caudo-medial edge of the tibia, which predisposes to fracture. A second screw is then inserted which is blocked on the crest of the surgeon’s choice and, once this is blocked, the push-pull apparatus of the first proximal hole is removed and this screw is inserted and blocked.
18.
The insertion of the third screw on the crest is at the discretion of the surgeon.
The superficial planes are sutured in a routine way, taking care not to leave dead spaces to avoid the formation of seromas.

X-Porous TTA – Surgical Technique
© X-Porous TTA created by Ad Maiora srl
Via della Costituzione 10, 42025, Cavriago – Italy
info@ad-maiora.eu
support@ad-maiora.eu
+39 348 868 3311
www.ad-maiora.eu
